Friday 29 January 2016

Windows 8.1 Activator Free Download

Windows 8.1 Permanent Activator 2015 is the best activator for Windows 8.1 PRO, Ultimate etc. as compare to other Windows 8.1 KMS Activator or DAZ Loader. This is KMSpico Activator.


This Windows 8.1 Permanent Activator can activate

  1. Windows 8 Any Edition / Bit Rate
  2. Specially Windows 8.1 Pro
  3. Windows 8.1 Any Edition / Bit Rate
  4. Windows 8.1 Update 1
  5. Windows Vista Bussines / Enterprise
  6. Windows 7 Professional / Enterprise
  7. Office 2010/ Office 2013
  8. Windows Server 2008 / 2008R2
  9. Windows Server 2012 / 2012R2
  10. Windows 10 Technical Preview(not tested yet)

Working of this KMSpico Windows 8.1 Activator

  1. Disable antivirus and firewall. (This is totally safe)
  2. Download and install the program. (Stucks at the end but don’t worry)
  3. Go where you have installed this KMSpico.
  4. Now open KMSELDI.exe.
  5. Click tokens backup button which is with an arrow facing down icon (then click yes to next window)
  6. Now Click Red Button
  7. A success confirming dialogue will appear.
  8. Restart to remove if watermarks are still there / Do not Uninstall KMSpico from your system
  9. That’s it.

Features of Windows 8.1 Activator KMSpico

  • Small sized.
  • No internet connection needed.
  • Totally secure.
  • Activate all editions.
  • Activate office 2013 too.
  • Genuine activation.
  • Permanent activation.

Wednesday 21 October 2015

WiFi Password Hack 2015 Online

The latest Online | WiFi Hacker | 100% Online | No Need to Download! |

This WiFi hacking tool uses the WiFi Adapter in your Mobile or Desktop Device to decrypt WEP, WPA and WPA2 Keys in an average time of 60-90 seconds!

You must type in the Network Name exactly how it is displayed and ensure to enter the correct number.

This tool can be used while connected to another WIFI network! Please note, this tool should be used for testing purposes only.


Thursday 27 August 2015

HOW TO | CREATE BOOTABLE USB | FREE DOWNLOAD RUFUS |


Rufus is a utility that helps format and create bootable USB flash drives, such as USB keys/pendrives, memory sticks, etc.
It can be especially useful for cases where:
  • you need to create USB installation media from bootable ISOs (Windows, Linux, UEFI, etc.)
  • you need to work on a system that doesn't have an OS installed
  • you need to flash a BIOS or other firmware from DOS
  • you want to run a low-level utility

How to Create Bootable:

1- Attach a usb with the laptop.

2- Open Rufus then browse the ISO file of The window you want to install


3- Now click on Start then a new tab is open to format click ok.


then the process is start it takes some time to create full bootable usb.

Download Here:

Tags: free download rufus,bootable usb creator,how to create bootable usb,rufus free download,

Tuesday 4 August 2015

Windows 10 All Editions Official Final ISO File

Windows 10 All Editions Official Final ISO File

Microsoft Windows 10 official iso’s has been released by microsoft and available fodownload for free from direct resumeable links exclusively on SadeemWorld.com and that’s not it we have provided an activator along with official iso files of windows 10, Windows 10 Home , Windows 10 PRO, & Windows 10 Enterprise is available for download and can be activated using this activator.

Windows 10 is familiar and easy to use, with lots of similarities to Windows 7 including the Start menu. It starts up and resumes fast, has more built-in security to help keep you safe, and is designed to work with software and hardware you already have. So Why become late ? Get Windows 10 Final Build on your devices today !


Windows 10 All Editions Direct Download Links!

(Windows 10 Enterprise Edition)

Click Here:


Windows 10 Final Activator Free Download

Windows 10 Final Activator Free Download

Windows 10 Activator – KMSpico 10 Final


How to Activate ?
If you have tried any other activators you must do a fresh re-installation of Windows 10 before using thisactivator.Otherwise it will not work and you will end up with no success ! Anyway you can try it if you want.

  • Disable any virus guards/Firewalls/Windows Smart Screen first
  • Download and install Activator
  • Now open ‘KMSELDI.exe’ from  ‘C:Program FilesKMSpico’ folder
  • Click tokens backup button which is with an arrow facing down icon (click yes in next message box)
  • After that click Red button
  • Wait till it says program completed ,activator will close itself ( if it freezes at some point,download and use the alternative KMS Activator we have given below)
  • Now you are Done !
  • Check your Windows 10 computer properties  Activated !!
  • Restart to remove if watermarks are still there / Do not Uninstall KMSpico from your system !


Click here:

Monday 3 August 2015

Nokia PC Suite 7.1.180.94 | Connect Your Mobile With Laptop Or PC |


Nokia PC Suite is a collection of tools that allows your Nokia handset to connect to your Windows machine and sync data, back up your phone's contents, push software updates to your phone, as well as share files between desktop and mobile phone. Supporting a long list of Nokia phones, Nokia PC Suite is easy to install and launch on your Windows machine.

The interface used by Nokia PC Suite is simple, using a set of icons to show different tasks. When a phone is connected, it appears with its status in the left pane of the software; the right pane with the icons for various tasks provides quick action. Nokia PC Suite lets you sync Outlook on your desktop to your phone, and that capability works well. A neat capability is to dock your phone with your laptop or desktop and use the phone as a modem for Internet access. In use, we found Nokia PC Suite to be friendly, relatively fast, and trouble free.

If you have a supported Nokia phone (which includes most models from the last few years), Nokia PC Suite is a useful add-on to your Windows machine. The ability to back up and update your phone is handy, and the integration for calendars, contacts, and music or photo files is handy. We liked Nokia PC Suite quite a lot.
Click Here:
Or

Sunday 2 August 2015

BlueStacks For | PC and Laptop | Whatsapp for PC or Laptop |

Free Download BlueStacks For | PC and Laptop | Or Run Whatsapp On PC


App Player

Your Favorite Mobile Apps + Games are now free on your PC


To Run Whatspp on Your Pc or Laptop You Just Click Here to download Bluestacks app Player on PC or Laptop:

Windows 7 Activator | Windows 7 Loader | 32 bit or 64 bit

Free Download Windows 7 Activator | Windows 7 Loader | 32 bit or 64 bit

How to Activate Windows 7 by Using Windows 7 Activator Free Download?
  1. First off all you must Install Windows 7 Ultimate ISO 32 bit or 64 bit.
  2. Now just Quit system from other windows processes, and save your unsaved data for processing.
  3. Download Windows 7 Ultimate Activator and Run this Windows 7 Activator.
  4. Now Click on Install button to install Windows 7 Ultimate Activator.
  5. Now just Restart PC.
  6. After restarting your PC move to System Information panel.
  7. you will see activated windows 7.

Windows 7 Activator Free Download Working for 32 bit and 64 bit [Updated]:


For Download click Here:

Sunday 19 July 2015

Windows 10 | Pro Build 10240 ISO | 32 bit 64 bit | Free Download

Windows 10 Pro Build 10240 ISO 32 bit 64 bit Free Download

Windows 10 Pro Build 10240 ISO 32 bit 64 bit Free Download.It is Full bootable ISO image of Windows 10 Pro Build 10240 ISO X86 & X64


Just Click Here

Friday 8 May 2015

Free Download | USB Disk Security | 2015 Full Version

Free Download USB Disk Security 2015 Full Version

This download is 100% clean of viruses. It was tested with 26 different antivirus and anti-malware programs and was clean 100% of the time. View the full USB Disk Security virus and malware test.


Free Download | Opera Mini | Full Version

Free Download Opera Mini Full Version

Opera browser – My way to
For more speed, more simplicity, more security.
go online|
Download the fast and free web browser.

Free Download | Mozilla Firefox | Full Version

Free Download Mozilla Firefox Full Version

Download Mozilla Firefox 2015 Final - Free Download Full Version. Mozilla Firefox is a web browser independently designed to browsing (loads sites) the Internet quickly , and like many Internet browsers other ( Google Chrome , Internet Explorer , Opera , Safari) { ... } has adopted the program Mozilla Firefox on the speed of forgiveness and quickly navigate between web pages , software Firefox offers many of user-friendly features such as : a set of extensions available for free ( add-ons ) that allows you to easily add the features you want and customize the browser to suit your needs , surfing easier and faster , password manager and parental controls , Firefox 2014 protects against phishing sites that includes viruses and spyware.


Free download | Google Chrome | Software Full Version

Free Download Google Chrome Full version,

Download it by just 1 click.
Google Chrome is very popolar in these era Due to it's Fast speed and error free version.


Sunday 1 March 2015

How to add | Live Customer Chat Support | in blogger

Add Live Chat Support:


Way to Interact: It gives you a way to interact with your readers face-to-face by a live chat so that you can understand their needs and can improve your services according to their needs.


Professional Support: Having a quality support always indorse how dedicated you are towards your product. The quality support you provide to your users, the more professional your company would appear.

Step-1: Installing MyLiveChat Plugin in Blogger:

The very first thing you’ll be doing is to register yourself on MyLiveChat by entering your personal information like email, password and name. Be sure to agree to their agreement and press "Create Account Now" Button. Once done, simply login to your account so that we can create a chat widget that could easily be added to your blogger enabled product site.


After you are finished with registering your account, you will be redirected to a new page where you will notice a code that you need to add in your blogger site (as it can be seen in below screenshot). Just copy the code and proceed to the next step.


Now to Go to Blogger >> Template >> Edit HTML >> Search for </body> and just above it paste the code you copied in the previous step. Once done, save the template and with that MyLiveChat widget is successfully installed in blogger.

Step-2: Creating a new Agent:

After successfully installing the chat widget in your blogger site, it’s time to create agent ID that you could use to interact with your customers or readers.
Go to MyLiveChat Agents, and you will notice a default agent account. Since, you are on free account you are only allowed to have one agent account so click on the pencil button to edit the existing agent account and customize the information as you like.


Step-3: Starting Chat with Your Clients:

To start chatting with your customers and users, you have to install a desktop applicationor use online web application. If you opt for Web application you have to enter your MyLiveChat application ID that you can find here under account information tab. Furthermore, you have to enter your agent user name and password to login. Once you are done entering your information, press the "Login" button.


That's it, you should now see a chat widget at the right corner of your website. Users can easily input their questions and you can answer them later if you are not online. This widget is indeed fast, professional and FREE to use. To check the demo of this widget click here. Do share your thoughts about this tutorial, in case you have a better plugin then feel free to comment its name below.

Saturday 28 February 2015

How to add | Google Adsense | to blogger

Google AdSense:

Google AdSense manage all the hosting part, you don’t have to worry about hosting your ads or looking for potential advertisers. Google maintains a healthy relationship with the advertisers and keeps on serving your website with quality high paying ads.Google AdSense is a CPC (Paid per click program) which means that you will be paid each time a user clicks on the ads. However, it also provides paid per impression depends upon the audience your blog is getting.


Google AdSense provides a hassle free way to earn money online by simply displaying advertisements of different sizes on your websites. It provides opportunity to website owners to place different image, video, text based and rich media animated advertisements on their websites. These ads work on user’s interest which means they are targeted according to your audience and content.

Advantages of Google AdSense:

  • Quick Approval: AdSense is an advertising company that tends to support new publishers this is the reason why they quickly approves your applications even if you have less traffic. However, your website should consist of high quality content to get a green signal.
  • High Payouts: Since, AdSense is biggest advertising company. Therefore, it also has some high potential advertisers who pay nice money to the Publishers that have targeted audience from USA, Europe and etc.
  • Robust Reporting: It provides you second-to-second reporting so that you can easily track the performance of your ads. It even provides details about the user’s location who clicked on one of your ads and much more.
  • All This for FREE: You get this much and a lot of other useful features for a cost of FREE. In fact, it is allowing you to earn a significant amount of money without spending a single penny.

Get Started With Google AdSense:

The very first thing you need to do is to sign up for a Google AdSense account. You can use your Gmail address for signup process, if you don’t have a Gmail account then register first.After submitting your application, it will take around 24 hours to know whether you are approved to place advertisements on your site or you have to improve your site before you can be the part of AdSense Publishers.
In case your application is approved, then you can log into AdSense account to get the Ad Code which you will be placing on your website.

Once you are logged in to you AdSense, click on "My Ads" tab and then press "New Ad Unit" button.This will take you to “Create Ad unit wizard” where you can customize your ad size, color, ad type and etc.
Name of AD Unit: You can name the AD unit so that you can easily track its performance. For example, if you will be using this ad unit in your sidebar then you can name it as “SIDEBAR AD” or etc.

Selecting AD Size: AdSense offers wide range of Ad sizes so that you can select the one which fits your needs as well as your website’s design. The recommended ad sizes includes 300x250,728x90 or etc. why, because these ads are more likely to provide you high earning opportunities. In other words, you can say that these ads are of higher potential to provide you more earning on each ad click.

Selecting AD Type: AdSense offers different kinds of ad type like image ads, text ads and rich media ads. You can choose the type according to your website. However, it is recommended to choose “text and rich media ads”

Styling Ads: You can customize the style of your text based ads by matching the color to your website’s color scheme, because it is always considered as best practice to get a boost in earning.
Once you are done with customizing your ad unit, simply press “Save and get code”. A new window will pop-out providing you the code of the ad you just created. Now copy the ad code as we will need it in the next step.


Adding Google AdSense in Blogger:

Now it depends on you whether you would like to show the ad in your sidebar or content. However, most people recommend showing ads in the sidebar as it doesn’t interrupt your users while they are reading your content.
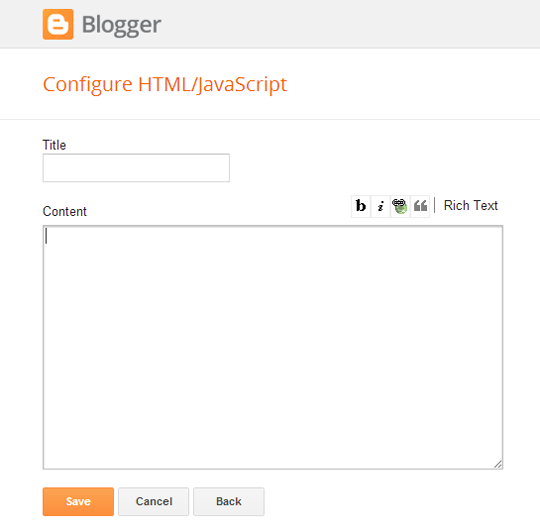
Simply go to Blogger >> Layout >> Add a Gadget >> Add HTML/JavaScript >> paste the Google AdSense ad code in the HTML text area which you copied earlier and once done press “Save”.


That’s all, you have successfully added Google AdSense on your blogger site. For better placement you can place your ads between your content or you can do some experiments as well. If you are already using AdSense, then do share your experience with them. If you like our article, them share it with your friends on Facebook, Twitter or Google+.

Tuesday 24 February 2015

How to | Hack Facebook Password | Without any software [ 100% WORK | 2014 ]

Facebook Account Hacker


You can also Hack others account by using this method.


Monday 23 February 2015

Free Video to MP3 Converter


Use Free Video to MP3 Converter to extract audio from video files to MP3 and WAV Lossless Audio. You can save audio in high, standard and economy quality.


Input video file formats:*.avi; *.ivf; *.div; *.divx; *.mpg; *.mpeg; *.mpe; *.mp4; *.m4v; *.webm; *.wmv; *.asf; *.mov; *.qt; *.mts; *.m2t; *.m2ts; *.mod; *.tod; *.vro; *.dat; *.3gp2; *.3gpp; *.3gp; *.3g2; *.dvr-ms; *.flv; *.f4v; *.amv; *.rm; *.rmm; *.rv; *.rmvb; *.ogv; *.mkv; *.ts.

Free Video to MP3 Converter automatically fills the title tag and the artwork, taking a snapshot from the middle of video, which can be seen in iTunes, Winamp or just a Windows Explorer folder.Free Video to MP3 Converer is clearly free. No adware or spyware. It's safe to install and run.
DVDVideoSoft's products are freeware. In order to maintain product development and provide you with high-quality software, DVDVideoSoft may bundle links to other websites and third-party apps installations including toolbars in its products. Every time DVDVideoSoft products are installed, you have an obvious option to accept or opt-out of such installations.


Windows 8, 7, Vista, XP SP3


Common Troubleshooting | Problems in Computers |

Below is a list of common problems experienced while assembling a PC. Please check the list which could have the possible solution to your problems.


1- The PC does not boot, the power and HDD LED does not come on, there is no display on monitor.

Solution: Check that your main power cable is plugged into the ATX power supply. Make sure you have connected the ATX power connector to the motherboard. Check if the cable for the power switch at front of the PC is connected to the correct pins on the motherboard.


2- The power LED comes on but the PC does not boot, there is no display onmonitor.
Solution: Check if the processor is firmly into the socket. Check CPU jumpers to verify if CPU frequency is correctly set.


3- The PC does not boot, but is beeping.


Solution: Different BIOS manufacturers use various number of beeps to indicate faults with various hardware. In an Award BIOS motherboard you will get following beeps:
1 long 2 short: Graphics card is not securely into place, or faulty.
1 long 3 short: Graphics card is not securely into place, or faulty video memory.
Continuous beeps: No memory, or memory not securely into place, or could be faulty.
Continuous high/low beeps: No CPU, or CPU not securely into place, or could be faulty.
Please refer to your motherboard manual to confirm what the beeps are trying to tell you.


4- The PC boots but the CPU speed is incorrect.

Solution: The CPU frequency jumper setting is incorrect. Refer to your motherboardmanual to set it correctly.

5- The HDD is not being detected by the BIOS.

Solution: Check if you connected the IDE cable to the motherboard correctly, is pin 1 on the IDE cable connected to pin 1 on the IDE sockets on both motherboardconnector and HDD connector. Check if the HDD jumper is set to master and any other device sharing the same cable is set to slave. Click here for more details.


6- I can not access my CD/DVD-ROM in DOS mode, hence can not install Windows.

Solution: CD/DVD-ROM device driver is not installed. Install the manufacturer supplied device driver. If you do not have a device driver disk, you can use the windows boot disk which will provide access to your CD/DVD-ROM, so that you caninstall Windows.